

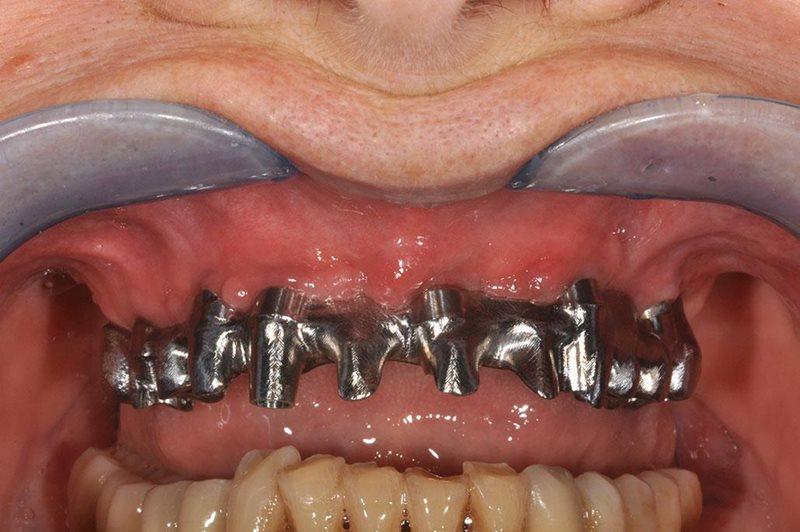
Complete restoration of the entire bridge prosthesis
New technologies allow you to transfer the execution of traditionally manual processes to the computer. This way you can get a much more efficient workflow, which saves time and costs.
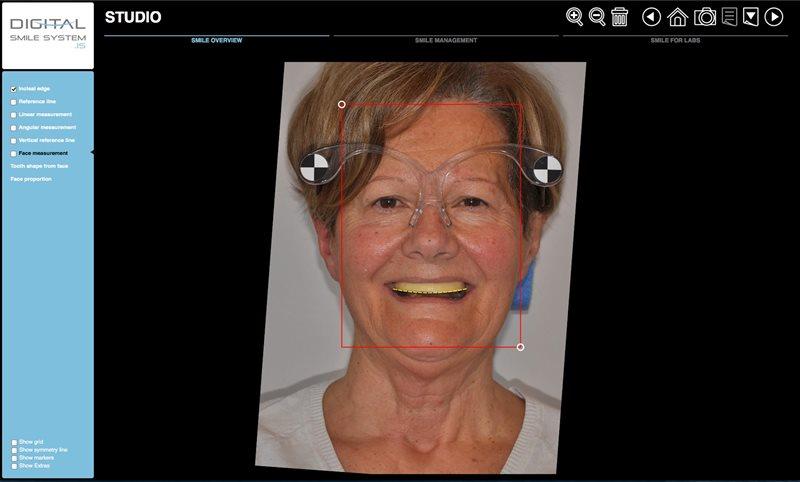
The first step in dentistry is to assess the clinical situation. In particular, for important restorations, this Protocol starts with managing patient images. With only two images (photos) of a patient: a photo of their smiling face and an intraoral cavity, you can easily create a clinical, functional and aesthetic smile design using an innovative software called Digital Smile System (DSS).
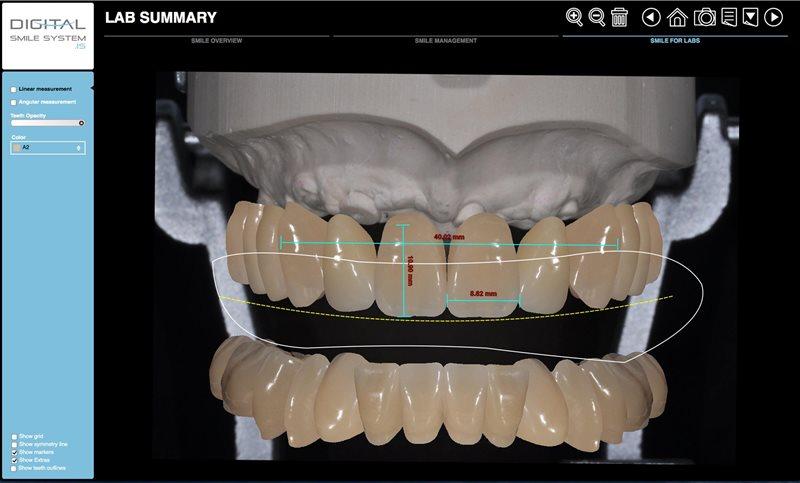
Thanks to a controlled workflow, the software allows the user to quickly make a test with a virtual smile, “trying on” it on the patient’s face, with Autonomous digital processing control. Thanks to the marker glasses, DSS can automatically combine two images and a new design. This special calibration system allows users to study the morphology of the patient’s face and get very accurate measurements to facilitate the work of the dentist and technician (photos 1-3).


For patients who are missing all their teeth, the tool allows you to make a preliminary overview of the patient’s suitable prosthesis options. At the initial stage of planning, computer modeling methods and in particular DDS have a huge advantage both for planning work and for information (photos 4-7).
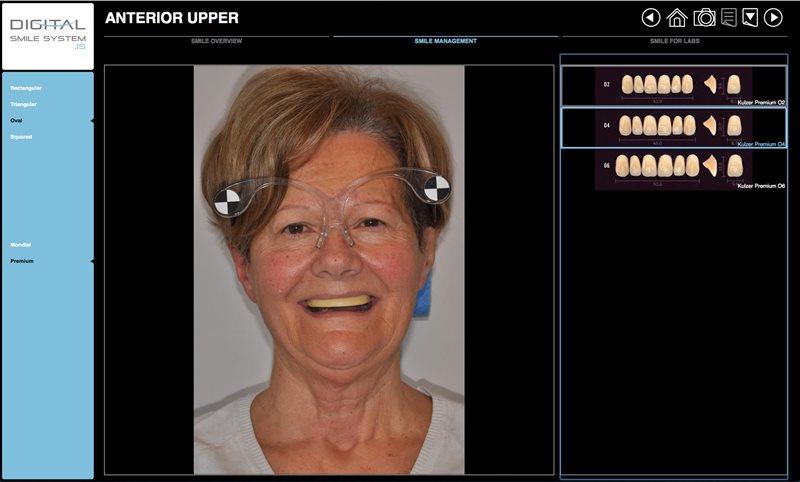


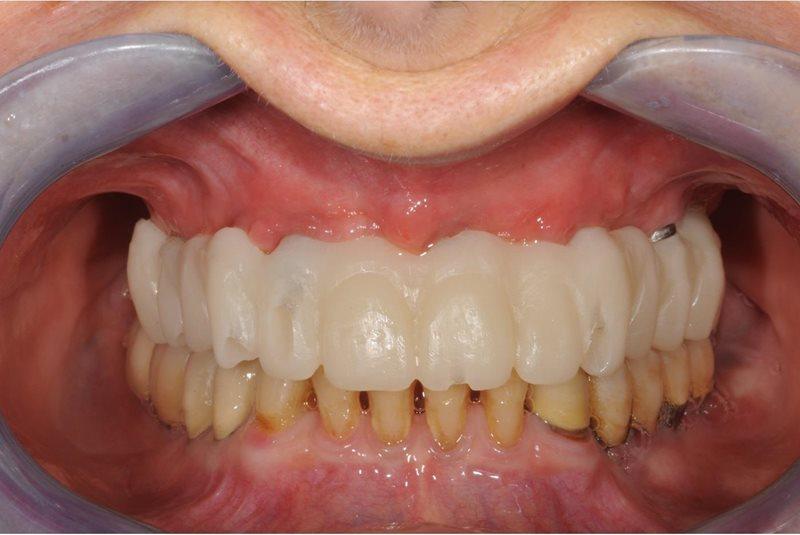
In fact, this simplifies the work of the dentist – you can immediately present the final result of the patient’s prosthetics (photos 8 and 9) and provide the necessary information for the dental technician to make implants.
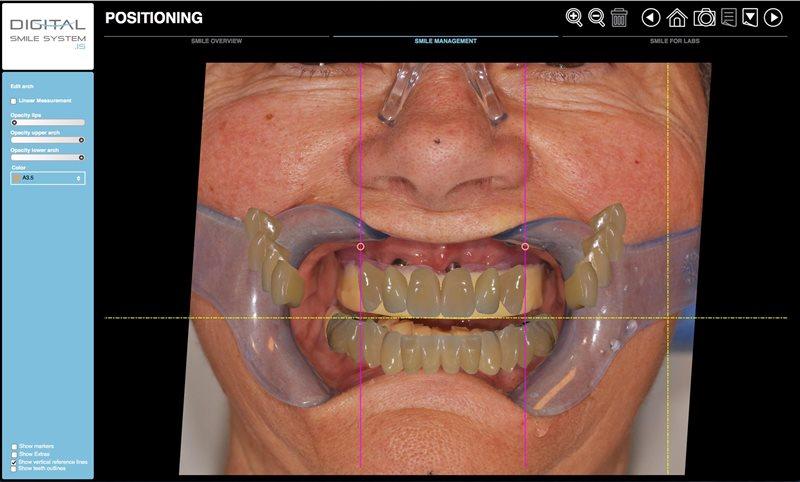

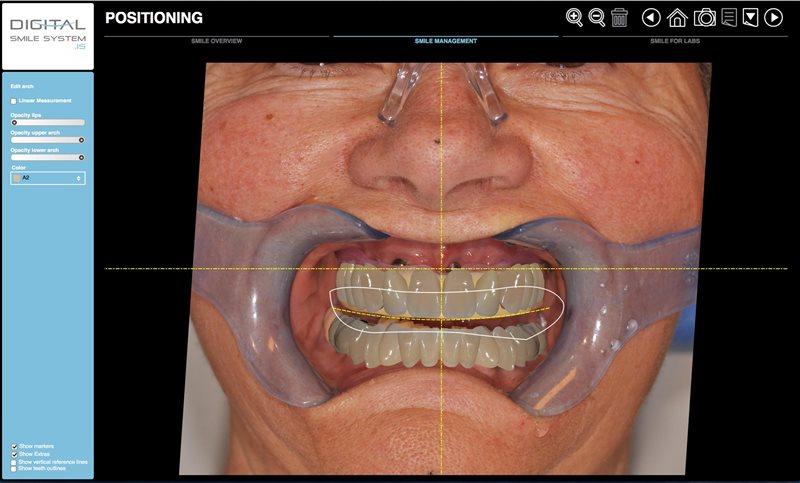
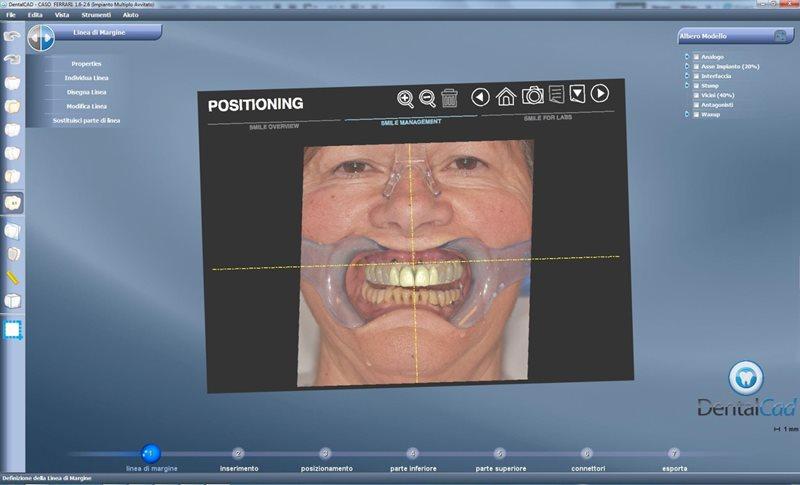
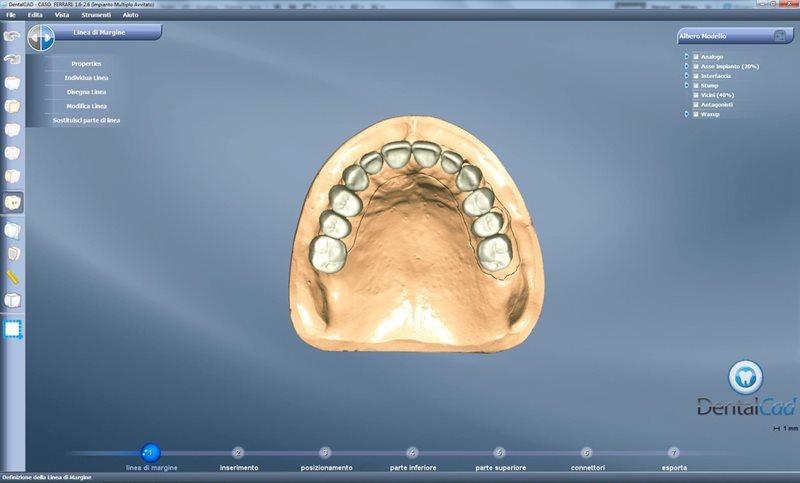
After the preliminary visualization was completed, the dental arch design was prepared for transmission to the CAD system. By combining directly with the Dental Cad program (EGS), DSC can automatically export 3D-compatible output to support CAD modeling (photos 10-13).


After defining the aesthetics, the workflow proceeds to capture 3D data (the second stage of the digital dental workflow).
First, we used a desktop scanner with a textured blue light (Hddscan 3 Blue Light, LEGS) to get data from the model. This provided very accurate data (up to 15 microns) that we transmitted to the laboratory (photo 14).

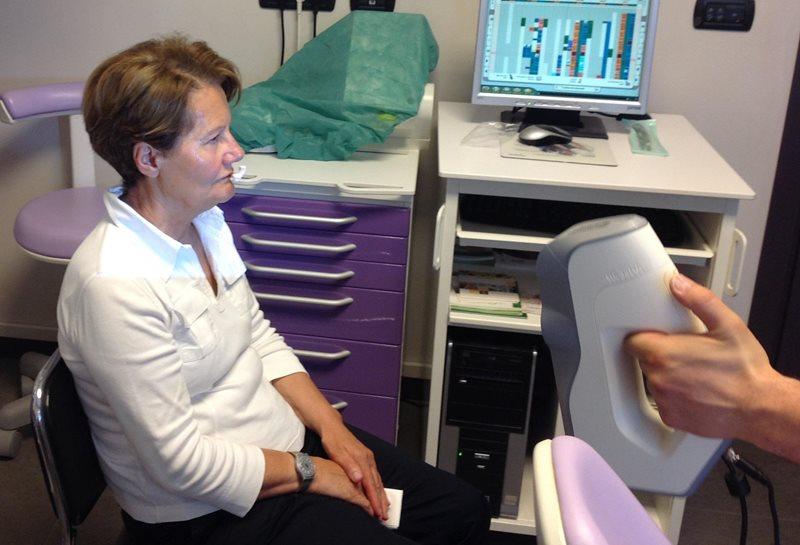
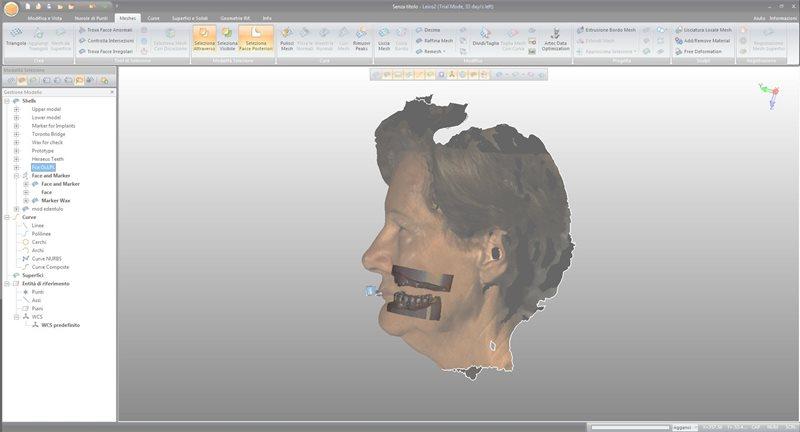
Then we used a body scanner to scan the face with great accuracy (photo 15).
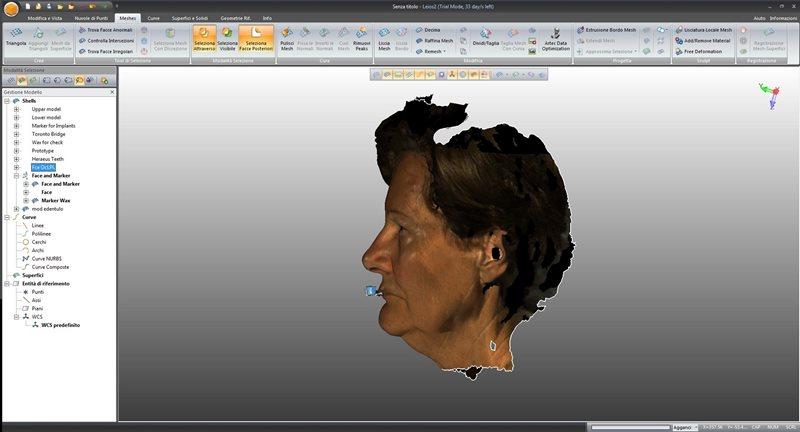
This scanning step is crucial for building the volume and for the subsequent implementation of the structure (photo 16). At this point, all the collected data was transferred to Dental Cad.
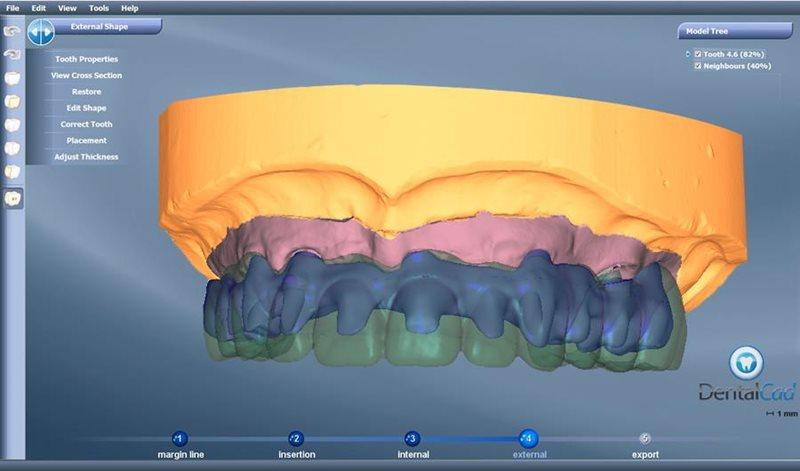
We then created the property using simple 3D modeling tools and importing volumes developed by DSS (the third step of the digital dentistry workflow).
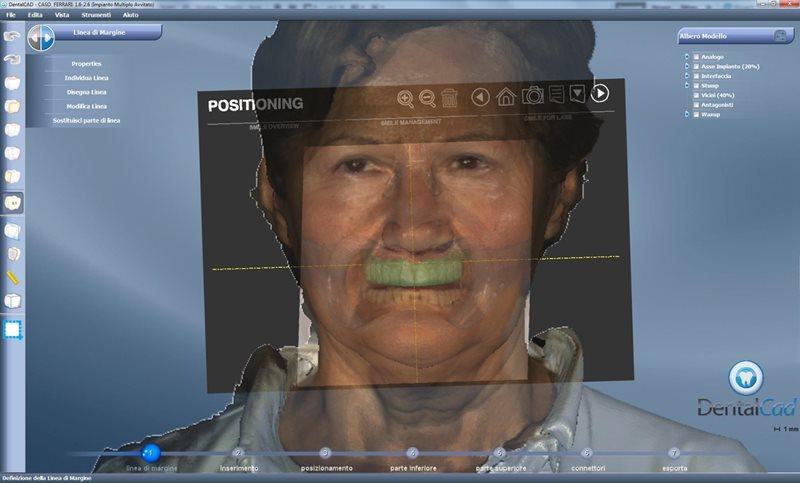
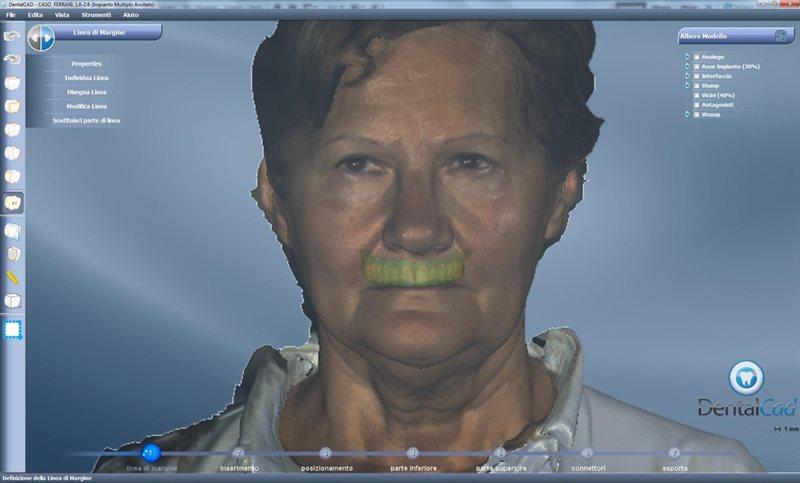
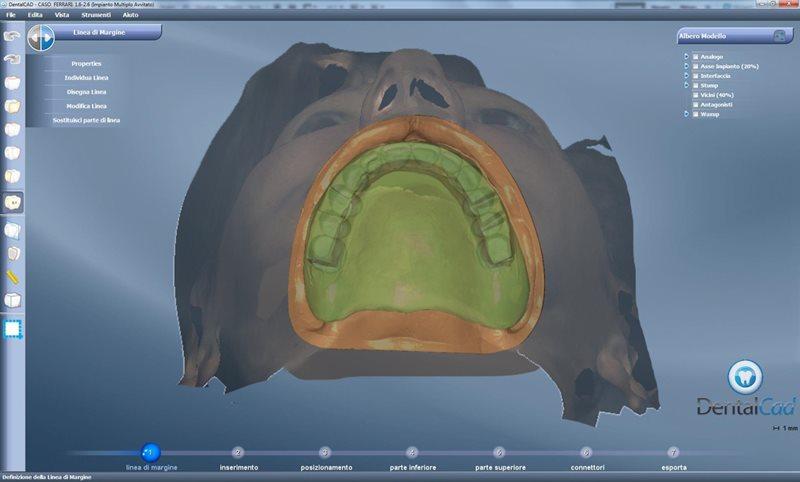
Using 3D data from the face and mouth, we were able to study occlusion, as well as the relationship between teeth and lips. This made it possible to combine 3D visualization of the face with 3D visualization of the oral cavity thanks to an additional scan made from an external (extra-oral) reference point (photos 17-22).
The high quality mesh created with Dental Cad allows you to make 3D printing of the structure from PMMA to test it on the patient. In accordance with the procedure, all the settings necessary for the implementation of the final prosthesis were performed in a very short period by screwing the prototype directly into the patient’s mouth (photo 23).
The use of these technologies provides numerous advantages, in particular, the reproducibility of the developed forms and prototypes. The resulting prototype can be considered final, which greatly simplifies the procedure for creating a restoration; project Files will be stored digitally and in addition, the patient receives a preliminary view of the visualization using the prototype (photo 24). The prototype is also very important for the dentist’s work to control the relationship between teeth and lips (in terms of aesthetics, phonetics, and soft tissue support).
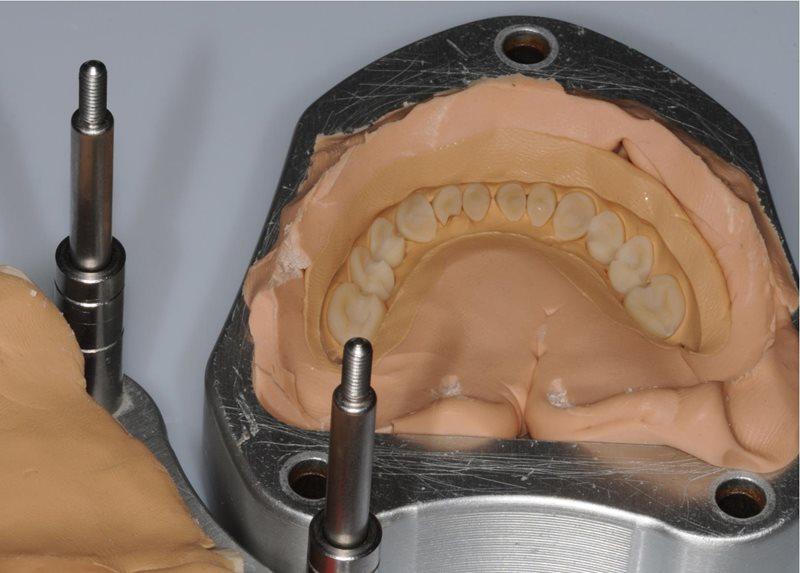
After this step, a structure was developed to support the acrylic prototype of the teeth and also built in DentalCad (photo 25A-b).
Our goal was to create a titanium structure by reducing the prototype on which the teeth were to be placed as planned in DSS. We created and submitted CAM files for order processing using the software built into DentalCad. After the milling cycle (the fourth stage of the digital dental workflow), the product was carefully adapted to the model in order to complete the work. In particular, the titanium structure was prepared and the acrylic teeth were arranged using a verticulator (photo 26).
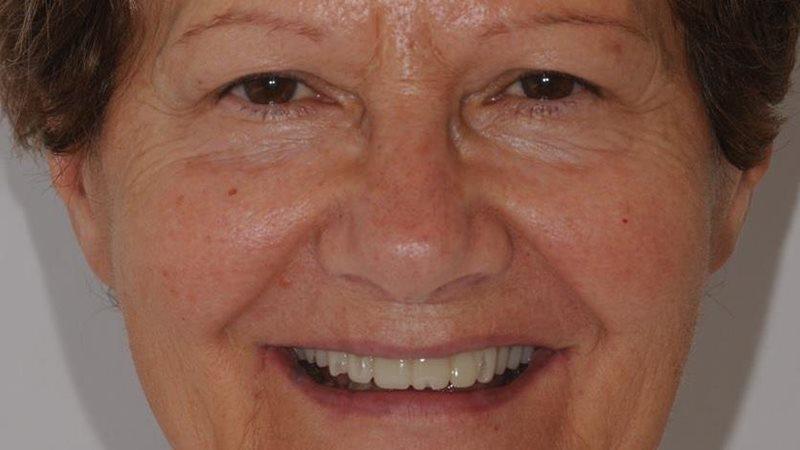
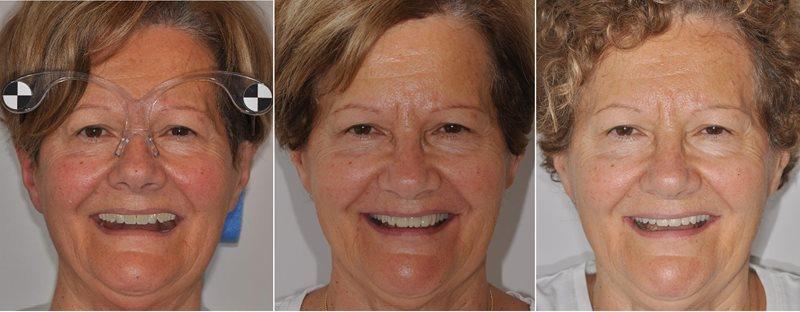
With the help of new digital technologies, the dental technician gets the opportunity to develop their skills and implement a creative approach, focusing on aesthetics and functionality. As you can see, the final result was obtained in full accordance with the program established with the patient during the first stage of working with digital dentistry (photos 27 and 28).

The Protocol covers all stages of the project, from the selection of materials for production to the final promotion of the work of the dentist and dental technician and the presentation of several new benefits for the patient.
The article clearly demonstrates how the advantages provided by digital technologies are increasingly used in everyday work in dental practices and laboratories. In particular, it shows how the use of a 3D scanner and specialized software becomes part of the workflow in dentistry. This makes it easy to see the aesthetic and functional preliminary final result and makes it easier to work in a CAD / CAM system.